How to Revert Windows 10 Volume Control Back to Windows 7 Style (or how to bring back the Windows 7 volume slider in Windows 10)
Here is a step-by-step guide for returning the new Windows 10 volume slider to its more intuitive, better-looking Windows 7 predecessor.
1. Enter the registry key editor by executing a run command and running ‘regedit’

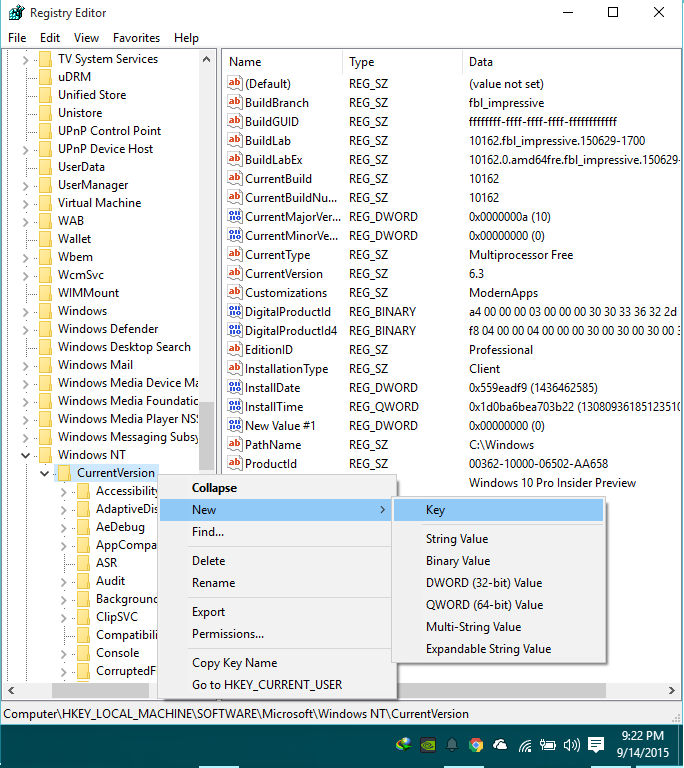
2. In the window that shows up, navigate to HKEY_LOCAL_MACHINE/Software/Microsoft/Windows NT/CurrentVersion
Now, search for the directory (also known as a key) titled “MTCUVC” and if it isn’t present, you’ll need to make one. To make it, right click “CurrentVersion” and navigate to “New,” then select “Key” and name it MTCUVC.

3. Right click the space in the right-hand area of the registry editor (there should be a value named Default at the very least in this space already) and make a new DWORD (32-bit) Value

4. Name this new Value “EnableMtcUvc” and under the “Data” section ensure the value remains 0

5. Save your work and restart your computer, if necessary

You should now have returned your volume control to its Windows 7 state!