Re-sizing Your Windows 10 “Save As” Window (in other words we will show you show to change the size of the “Save As” window in Windows 10)
Having the ability to customize your Windows UI so that it meets your aesthetic and practical standards is part of what makes Windows 10 great. Whether you are using your computer for work or for pleasure, you will spend a lot of time looking at it, so customization is key! Windows 10 gives you this option in spades, allowing you to tweak the existing UI to whatever your unique tastes might prefer.
The “Save As” window shows up whenever you choose to save an untitled file, or when you deliberately select the “Save As” feature. As such, it will be in your face fairly often, and you may want to have it look differently when it is. One way of changing its appearance is to resize the window.
To do this, you’ll first need to open a document or some file you’re looking to save. If it’s untitled, simply save it (either with Ctrl+S or by navigating to File > Save), otherwise navigate to the “Save As” option the File dropdown. Once the window has opened, you can resize it however you like using your mouse at the edges or corners of the window. Once you’ve adjusted it to a size you like, the Save As window will automatically remember its new size and will always be the size when it opens!

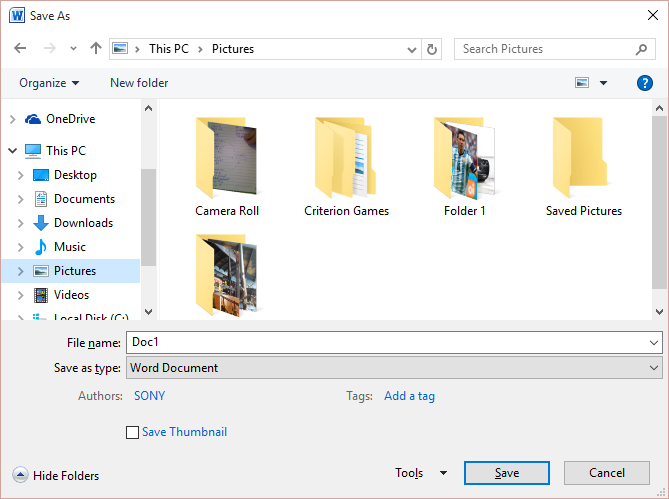
After re-sizing the window it will look like this:

Congratulations! As simple as it was, you’ve just customized your Windows 10 UI.