A hard disk does more than just store data, it can also save battery life. But how? Through ‘turn off hard disk after’ setting in Windows 10. You can also learn how to turn this setting off if you prefer to keep your hard drive spinning at all time.
One of the most important considerations when developing an OS is to how can it be tweaked to reduce power usage. Power usage is a fundamental aspect of any technological development. If an invention is capable of the most advanced of abilities but it uses too much power, then it simply won’t be sustainable for long. The large power usage would strike a huge blow to the economics which would ultimately lead to it being phased out. To make Windows 10 a power efficient OS was high on the agenda of Microsoft developers. The provision of extra functionality on compatible power usage was a challenge in itself taken head on by the developers. This led to the hard disk doing more than its normal duties, it was called upon to save power through the addition of ‘turn off hard disk after’ setting.
This feature works on the principle that the user can specify the OS that if the HDD is found to be idle for a certain amount of time, then it can be switched off. This activity can be useful in saving power and hence increase battery life. However, sometimes you need to access your computer quickly after a period of non activity. What would happen if the HDD has been switched off and you try to access it? No harm will be done, only a slight stoppage will occur for whatever procedure you wish to do as the disks on the HDD would have to spin back to carry out your instructions.
To use the ‘turn off hard disk after’ feature, right click on the battery icon in the taskbar and select ‘Power options’. Then depending on your power plan, select ‘Change plan settings’. Then select ‘Change advanced power settings’ as shown in the image below.

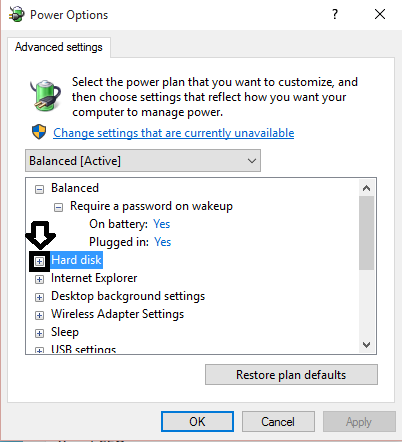
Now, click on the ‘+’ icon before Hard disk to drop down a menu as shown in the image below.

Repeat the same for ‘Turn off hard disk after’ and then select your specified time. You can set ‘turn off hard disk after’ to never to turn the feature off. It is worth mentioning that by default, Windows 10 has set the time to 20 minutes. This is because if a much smaller time frame is set, it will harm the HDD more than do it any good as the disks have to jump back to re-function. It is advised to set this time greater than 20 minutes. Furthermore, this feature does not apply to SSDs.
Striking and effective, this functionality will surely add some precious time to your battery.
The post How To Turn Off Hard Disk After Setting In Windows 10 appeared first on Windows Clan.
