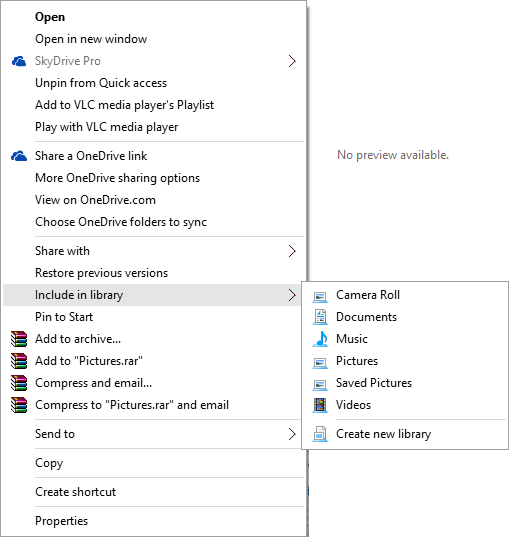
How To Exclude Option “Include In Library” From Right-Click Menu In Windows 10
The right-click menu can become extensive and cluttered if you don’t manage it. If you feel there are simply too many options and are finding a right-click unsightly, or spend too much time searching for the right option, then this step-by-step guide will help you. We’ll show you how to remove the “Include In Library” option from the menu. You’ll be making a registry file to perform this task.
1. Make a new text document on your desktop. You can do this by opening notepad manually or simply by right-clicking the desktop and navigating to New and selecting Text Document.

2. Write or copy and paste the following lines (including line breaks) into the empty document:
Windows Registry Editor Version 5.00
[-HKEY_CLASSES_ROOTFolderShellExContextMenuHandlersLibrary Location]
[-HKEY_LOCAL_MACHINESOFTWAREClassesFolderShellExContextMenuHandlersLibrary Location]
3. Save the text document as any name you like but with end it with the file extension ‘.reg’
4. Now run the file you have just saved (i.e. double-click it). Run through the dialog boxes that pop up, responding in the affirmative.

Congatulations! Once you’ve run the registry file, you should find the “Include In Library” option no longer a part of your right-click menu. You may have to restart your computer for this to take effect. If you’d like to bring the option back, simply repeat the above steps but input the following text into the regsistry file instead:
Windows Registry Editor Version 5.00
[HKEY_CLASSES_ROOTFolderShellExContextMenuHandlersLibrary Location]
@=”{3dad6c5d-2167-4cae-9914-f99e41c12cfa}”
[HKEY_LOCAL_MACHINESOFTWAREClassesFolderShellExContextMenuHandlersLibrary Location]
@=”{3dad6c5d-2167-4cae-9914-f99e41c12cfa}”
Run it, confirm the dialog boxes, and you’ll regain access to the “Include In Library” option.

